Soil is expensive. And the only thing more expensive is fertilizer. Or at least, good, organic fertilizer is expensive. The best kind of fertilizer is compost. Compost is the broken down, decomposed bits or organic (read plant not man-made stuff) material. All the nutrients in that material are broken down and are more easily accessible.
Typically compost is created by putting plant and food scraps in a pile and then turning it and letting it slowly decompose. As you might imagine, this takes a LOT of time and if you don't have an open space in your yard, a LOT of money to buy a container. It's also pretty smelly. None of these fit into my apartment lifestyle.
But I still wanted to make my own compost. How can I do that living in an apartment? Enter vermicomposting. Worms. That's right, let worms do all the work so you don't have to. Worms are essentially a few inches of digestive tract. All the do is eat and poo. And that worm poo (called castings because apparently 'worm poo' doesn't sound that great) is some of the best stuff around. High in nitrogen and other great nutrients, it can make so-so plants turn into monsters!! And if it's done right it doesn't smell, or so the internet says (and if it's on the internet, it's got to be true, right?).

So I set out to make a vermicomposting bin. This is the worms' home, and where you put the food scraps so the worms have something delicious to eat.
We started with a big rubbermaid crate we had sitting around, leftover from moving.
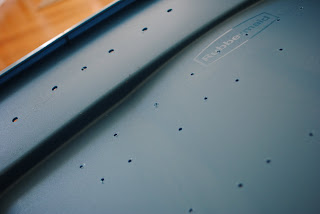
The reason a good vermicompost bin won't smell is because of air circulation. So that means drilling some holes. Actually, a lot of holes. J didn't seem to mind using a power drill and taking out some anger on the plastic bin.

 We drilled fairly large holes in the top to provide lots of air circulation.
You need air all around, so that means more holes. We kept the holes big around the top portion of the bin, but used a much smaller drill bit lower down. You don't want your worms or compost escaping where it's not supposed to of course!
And then about 6 very small holes on the bottom to allow for any excess moisture to get out. Though the goal is to not let the contents of the bin get that wet, but it's always good to have an insurance plan. We bought a foil cookie sheet to put under the bin to catch any unfortunate drippings.
The end result looked something like this:


This is just one plan of course. There's tons available on the internet, from lots of reputable sources. We just used the plan that required things we already had on hand. If you try another plan, please let me know!
And if you'd prefer to see how to make this in video form, check out the video below, which is what we used!
No comments:
Post a Comment